Sichuan-Tibet Highway Photography Guide: From Xinduqiao to Lhasa — How to Turn G318 Into Epic Shots
After many trips on G318, the most common regret I see is: camera raised, but the light's wrong; or the light's right, but you don't know where to stand. The Sichuan-Tibet Highway's landscape is enormous — 100km of nothing but snow mountains and grasslands, 50km of canyons and forests. When the scenery is this overwhelming, poor composition ruins everything.
This guide distills over a decade of photography experience on the Sichuan-Tibet Highway. I won't cover aperture, shutter speed, or ISO basics — instead, I'll tell you "what time to arrive," "where to stand," "what focal length to use," and "what to watch for." Use this as an index and look up each location as you go.
The Real Talk: The Biggest Enemy of Sichuan-Tibet Highway Photography Is "Rushing"
Photography isn't the instant you press the shutter — it's the process of waiting for light, finding the angle, and pressing the shutter. Most group tours give you "15 minutes here to take photos." What can you do in 15 minutes? The light hasn't even arrived yet.
On a bus tour of G318, you can only shoot tourist photos at fixed viewing platforms. Driving yourself? You're too focused on the road to find photo spots.
A Prado carpool is ideal for photographers — the driver knows the golden shooting window for each segment. He'll tell you an hour ahead: "We need to reach Maoya Grassland by 4 PM — that's the best light." Upon arrival, he parks in a safe spot while you shoot at your own pace — until the light fades, with no one rushing you.
The Complete Guide to Every Core Shooting Location
Kangding — Xinduqiao Section
Spot 1: Zheduo Mountain Pass Sunrise (7:00-8:00)
Standing at Zheduo Mountain pass looking southeast, the Gongga mountain group appears to the left of the main peak. Thirty minutes before sunrise, red and orange banded clouds appear on the horizon — the optimal window for "flaming clouds + snow mountain" shots. It lasts only 5-10 minutes.
- Focal length: 70-200mm, telephoto to bring Gongga's main peak closer
- Settings: ISO 100, f/8-f/11, tripod + cable release
- Note: Elevation 4,298m, -5 to -10°C (year-round) — gloves and hat are mandatory
Spot 2: Xinduqiao Autumn Colors (Mid-late October)
Xinduqiao's beauty is along the roadside, not at viewing platforms. About 2km from Xinduqiao toward Tagong, there's a small hillside — climb up for an overview of poplar forests + Tibetan houses + distant snow mountains.
- Focal length: 24-70mm, mid-range aperture (f/8-f/11) for front-to-back sharpness
- Golden hour: 8:00-9:30 AM, sunlight from behind illuminates the poplar forest, leaves glowing gold
- Composition: Place a single poplar in the foreground, village in mid-ground, snow mountain in background — three layers
Litang — Batang Section
Spot 3: Kazila Mountain Sea of Clouds (8:00-9:30)
Kazila Mountain (4,718m) is the easiest place on the Sichuan-Tibet Highway to capture a sea of clouds. Conditions: rain the previous day + sunshine the next — moisture trapped in the valley, viewed from the pass as rolling clouds beneath your feet.
- Focal length: Wide-angle (16-24mm) for panoramas + telephoto (70-200mm) for distant peaks piercing through clouds
- Note: Cloud seas dissipate after 10 AM — go early. Stay no more than 10 minutes.
Spot 4: Maoya Grassland (16:00-17:30, best in July)
The grassland is most photogenic at 4 PM — the sun shifts westward, side-lighting the grass so every blade casts a shadow, creating explosive three-dimensionality.
- Focal length: Wide-angle (16-24mm), low angle close to flowers, using flowers as foreground and snow mountains as background
- People shots: Have someone walk into the frame, walking or standing in the flower sea, not looking at the camera. Flower close-up + person mid-ground + snow mountain background
Spot 5: Sister Lakes (all day, best morning light)
Two adjacent glacial lakes whose color changes with weather — deep blue on sunny days, dark green when overcast. Morning front-lighting gives the truest water color. Afternoon backlighting creates harsh reflections.
- Focal length: Wide-angle (16-24mm) to frame both lakes + Haizi Mountain glacial relics
- Advanced technique: Climb the small hillside north of the lake for an overhead shot of both lakes + the road leading to them
Zuogong — Ranwu Section
Spot 6: Nu River 72 Bends (16:00-17:30)
After 4 PM, sunlight angles in from the southwest, casting road curve shadows on the pavement — each bend has a clear light-dark boundary, creating extreme dimensionality.
- Focal length: Telephoto (70-200mm), compressing perspective to "stack" the layered curves
- Composition: Shoot from above (at the pass viewing platform), the road looks like a silver thread folding back and forth across the mountain
- Note: This spot is at a cliff edge — don't climb over guardrails for a better angle
Spot 7: Nu River Bridge (all day)
After descending the 72 Bends to the valley floor, you reach the Nu River Bridge. Not a traditional "scenic spot," but excellent for documentary photography — the river's power, the bridge's scale in the canyon, and the rock wall textures on both sides.
- Focal length: Wide-angle for the full bridge + telephoto for water flow details
- Note: No extended parking on the bridge. Shoot quickly from safe areas at either end.
Ranwu — Nyingchi Section
Spot 8: Ranwu Lake Morning Mist + Reflections (6:30-7:30)
Ranwu Lake's most beautiful moment is between 6:30 and 7:30 AM. Before the sun fully rises, the lake surface is mirror-calm with snow mountain reflections in perfect detail. The moment wind picks up, reflections shatter — so go early.
- Location: Middle Ranwu (the middle lake section) has the most complete reflections. Stay at a lakeside hotel — step outside and you're at the shore.
- Focal length: Wide-angle (16-24mm) for symmetrical composition of snow mountain + reflection
- Bonus: If there's morning mist on the lake, you've hit the jackpot — mist + reflection + snow mountain is professional landscape quality
Spot 9: Lulang Forest Sea (9:00-11:00)
Sunlight enters the Lulang forest from the east, turning oak leaves golden. Shoot from the hillside behind Zhaxigang Village — Tibetan village + meadow + forest + snow mountain, four layers.
- Focal length: Telephoto (70-200mm), compressing front and background to emphasize layers
- Autumn bonus: Mid-late October, all oak leaves turn gold — color saturation needs no post-processing
Nyingchi — Lhasa Section
Spot 10: Sejila Mountain Pass — Namcha Barwa Peak (probability-based)
Namcha Barwa is called the "Shy Maiden Peak" because it's perpetually shrouded in clouds. The probability of seeing it from Sejila Mountain pass is fewer than 60 days per year.
- Time: 15:00-17:00 or 7:00-8:00 AM. Near 100% cloud cover at noon.
- Focal length: Super telephoto (200mm+), Namcha Barwa is about 70km from the pass
- Mindset: Capturing it is luck, not capturing it is normal. Don't let waiting derail your entire itinerary — there's too much else worth shooting on G318.
Spot 11: Yamdrok Lake (day trip from Lhasa)
After reaching Lhasa, dedicate a day to Yamdrok Lake. The water color is the most stunning of all high-altitude lakes — Tiffany blue with five or six layers of variation in sunlight.
- Location: Overhead shot from Gangbala Mountain pass viewing platform. Then descend to the lakeside for close-up water shots + distant snow mountain shots
- Focal length: Wide-angle for full view + telephoto for abstract details of lake surface curves
- Golden hour: 9:00-11:00 AM front-lighting, lake is bluest. Afternoon is backlit.
Essential Gear Checklist for Photography
Don't say I didn't warn you: Camera battery drain at altitude is 2-3x faster than at sea level — low temperatures reduce battery activity. Bring two spare batteries and keep them in your sleeping bag at night for warmth.
- Camera body: Full-frame or APS-C both work — what matters is familiarity
- Lenses: One wide-angle (16-35mm) + one telephoto (70-200mm) covers most needs
- Tripod: Lightweight travel tripod — essential for sunrise/sunset + group shots
- CPL polarizing filter: Eliminates reflections from lakes and snow mountains, boosts color saturation
- Spare batteries ×2 (with overnight insulation strategy)
- Lens cleaning pen + air blower (dust is everywhere)
Honest Advice From the Heart
Don't shoot through car windows the whole way: Window reflections and color shifts will make you question reality — everything looks hazy. Have the driver pull over at safe sections and shoot standing outside. That extra minute is the difference between one good photo and a thousand wasted shots.
Not all beauty needs to be photographed: Some moments — the wind blowing across Sister Lakes, the first breath of thin air at Dongda Mountain pass, the smile of a Tibetan child waving by the road — these are too real, beyond what a camera can capture. Put down the camera, close your eyes, and remember it with your body.
Post-processing isn't a savior: Wrong light, poor composition, incorrect exposure — post can fix things, but it can't create a "good photo." Spend 80% of your effort being at the right place at the right time, and 20% on post-processing.
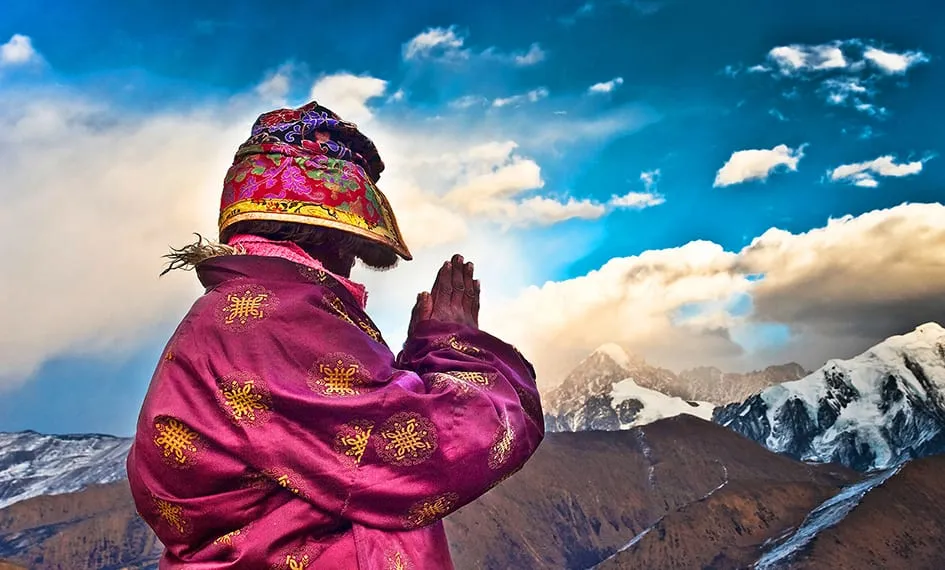
Ask before photographing people: Pilgrims, local Tibetans, monks — smile first, nod, and gesture asking to photograph. If they nod, shoot; if they shake their head, put the camera away. The difference between a good portrait and a sneaky shot is warmth.
Don't Just Snap Randomly — These Spots Are Incredible
I'm not holding back — the 11 spots above are already the highlights. Let me add one "secret weapon":
An unnamed curve on the Lulang-Nyingchi road: About 5km after descending Sejila Mountain, after a right curve — suddenly the Niyang River Valley appears below your feet, sunlight breaking through clouds onto the valley floor. No viewing platform, no sign — just a safe roadside pulloff. Finding it is pure serendipity.
What RoamFun Travelers Say
"Brought three lenses, but 90% of my photos were shot with 70-200mm. The Sichuan-Tibet Highway is so vast that wide-angle captures everything but highlights nothing. Telephoto brings distant snow mountains, yaks, and prayer flags closer — the storytelling photos are almost all telephoto." — Photographer A-K, Guangzhou ⭐⭐⭐⭐⭐
"Stayed overnight at Ranwu Lake just to shoot reflections the next morning. Up at 6:00, at the lakeside by 6:20, completely alone. Set up the tripod and waited 20 minutes — sunlight hit the snow mountain peak, perfect symmetrical reflection in the lake. Those 20 minutes were the highlight of my entire trip." — Xiao Lin, Beijing ⭐⭐⭐⭐⭐
Don't Let Your Camera Become a Wall Between You and the Scenery
One final thought — the most beautiful photos of the Sichuan-Tibet Highway aren't in your camera, they're in your memory. The camera is just a tool to bring that memory home. So shoot well when it's time to shoot, and when you're done, remember to put the camera down and see this world with your own eyes.
Want a hassle-free yet flexible trip?
Don't want to plan? Contact our senior travel designers now for your personalized route and quote.
Updated: June 2026 Author: RoamFun Senior Travel Consultant Questions? Contact: vip@roamfun.net
Craving a worry-free yet free-spirited journey?
Don't want to plan it yourself? Contact our senior trip designer now for a route and quote tailored to you.

RoamFun Senior Travel Consultant
Travel DesignerProfessional travel consultant, curating the most practical travel guides for you.